This post is about removing the threaded ports from a gender-bender VGA adapter so you can use it with a connector which already has ports. The photos will make it clear what I’m referring to.
I recently obtained a KVM switch. This will make sysadmin life at the console easier. Previously, if I needed to be on the console for a given machine, I had to connect the keyboard and monitor cables to the right box. With this KVM switch, I will only need to power on the monitor and press the right button on the KVM switch to select the server I want.
The switch in question is IOGEAR’s 8-port MiniView™ Ultra. It’s a PS/2 based switch, because all my servers have PS/2 ports. I guess I could have gone with a USB solution.
The unit does not need a power supply. It powers itself off the PS/2 port (I think) of the host[s] it is connected to.
The anonymous donor also included four PS/2 cables. I just needed some VGA cables. I had some M/M cables. My computers have a female VGA connection. The KVM switch has male VGA connections. This calls for a M/F VGA cable. I had M/M VGA cables, which is what most VGA cables are.

The above is the cable I had. I can’t use connect this cable to connect the server to the KVM because the KVM has a male connector.

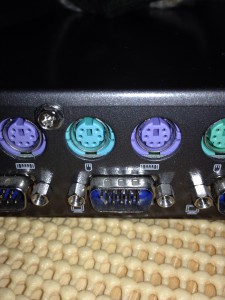
This is the connection on the back of the KVM switch. That’s the problem. Most VGA connections go from computer to monitor, both of which have female connections. That’s why most VGA cables are M/M.
Should I buy new cables? No. You can buy a gender changer, which is much cheaper.

The above is a VGA gender changer. Typically, it is used to connect two VGA cables to make a longer cable. You will notice the two posts on either side of the connector. These are used by screws on the cable to secure the cable to the connection.
It is these posts which will prevent the gender changer from connecting to the KVM. The solution? Remove the posts. I’ll explain how soon.

Here is the gender changer attached to the cable, which transforms the M/M cable into a M/F cable.
If you compare the connector on the cable to the connector on the KVM switch, you’ll see that the posts on the KVM will prevent the connection from occurring.
Now, let’s fix this. Remove the posts.

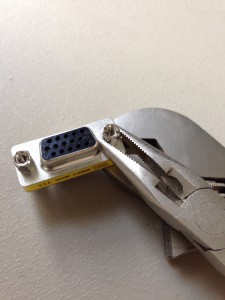
I used two tools, one on either end of the post. The nut came off easily. The post also unscrews.
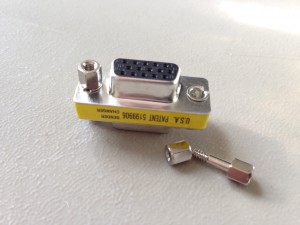
NOTE: although the photos show I have removed the post, I later reinstalled the post. The post allows the gender changer to be attached to the KVM switch. The cable can then be attached to the gender changer. Only the nut needs to be removed.

There, that’s one post removed. Now, repeat the process on the other post.

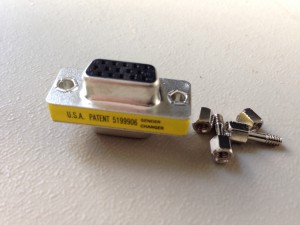
Both posts have been removed
Now the cable, with the gender changer attached, can be connected to the back of the KVM.


